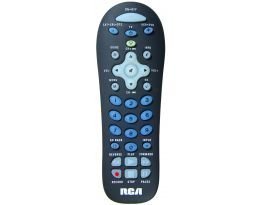
Our black colored 3 device universal remote is easy to set up and easy to use. This remote works with over 350 brands, and programming is a breeze. It can even control your digital converter box. It is perfect for today's DVR's and DVD players, it includes large keypads for easy navigation, and the partially backlit feature allows you to see the keys in the dark.
Customer Reviews
*** Product Information and Prices Stored: Mar 20, 2012 23:45:38
CÓMO PROGRAMAR UN CONTROL REMOTO UNIVERSAL JUMBO REMOTOS BAHIA Tube. Duration : 0.85 Mins.
REMOTOS BAHIA Absolutamente todo en Controles Remotos para TV - DVD - LCD - Home Theater - Audio Portón & Garage - Alarma - Aire Acondicionado. Igual a su remoto original, no requiere programación! La mejor calidad del mercado, con circuito integrado (no gota). Nueva línea para: LCD - Home Theater - Audio car - Kretz Cenit (para balanza). Portón & Garage: Aviatel - Lavandera - Peccinin - PPA. Y también universales de primera marca! ¡Más de 600 modelos, stock permanente, garantía escrita! Venta - Reparación - Atención al gremio. REMOTOS BAHIA En sus 2 UNICAS direcciones: Belgrano 115 12 de Octubre 549 (y Casanova) Tel.(0291) 451-7939 - Bahía Blanca (8000). Seguinos en Facebook: www.facebook.com/remotosbahia CONTROLES REMOTOS EN BAHIA BLANCA
In Windows Xp, you can install two operating systems on the same hard disk of one computer.
Whether you have two copies of Windows Xp, or two dissimilar operating systems, then you end up with dual boot engine when you restart your Windows Xp computer.
How To Program Rca Universal Remote
Dual boot means, the theory will give you a option of two operating system. For example, if you have two Windows Xp copies A ans B, the prompt will offer you to pick A or B to boot from.
How To take off One Operating ideas from a Dual Boot Windows Xp Computer
New-RCR312W 3 Device Partially Backlit Universal Remote Control - RCARCR312W Best
With this simple 3 device universal remote it is easy to set up and easy to use. Programming is a breeze. This is a perfect remote for today's DVR and DVD players. It includes large keypads for easy navigation. The partially backlit feature allows you to see the keys in the dark. It will work with over 350 brands. Comes in black finish.
Controls TV, SAT, cable, DVD, VCR, PVR, DVR
Perfect for any portable DVD's or TV and DVD combo units
Large keys for ease of use
Replaces or consolidates most major remote brands
Partially backlit allows you to see the keys in the dark
Controls 3 devices
Simple device set up
Code search key launches automatic code search
Sleep timer
Black finish
Works with over 350 brands
Also Controls Digital TV Converter Boxes Supported Brands: Access HD, Apex Digital, CASTi, Channel Master, Daewoo, Daytek, Digital Stream, GE, Gridlink, Insignia, Lasonic, Magnavox, Philco, RCA, Sansonic, Sylvania, Tivax, Zenith
Limited lifetime warranty
Customer Reviews
*** Product Information and Prices Stored: Mar 16, 2012 20:37:23
Also, dual boot engine can be used to have Windows Xp, and Linux O.S. Installed on the same computer.
In the case where you have two windows Xp copies on the same hard disk, you will perceive a slow performance in your system.
If you need to delete one Windows Xp copies, and leave only one, here is how you do it:
When you restart your system, and you get a option of two operating systems, you should pick the one you want to keep installed on your machine.
Once the startup process is done, and your computer is ready to accept tasks to achieve obvious functions, you click on the "My Computer" icon and uncover the hard disks, removable storage devices, and more.
In the hard disk box you should see two drive icons, like "C", "D". If the copy you installed later need to be cancelled, it must reside on the "D" part of the hard disk.
This is because the "C" is where you initial copy of the Windows Xp resides, and it is the one you want to keep installed as the only copy on your computer.
The way you should get rid of the "D" copy is to format the "D" part of the hard disk. Just right click it, and pick format. This will delete the Windows Xp copy you don't need.
In summary, you can have two operating systems installed on your windows Xp machine, which will offer a option of loading one of two operating systems.
The good thing is that you can cancel one, and leave the other, and your computer keeps running.
How To take off One Operating ideas from a Dual Boot Windows Xp ComputerCÓMO PROGRAMAR UN CONTROL REMOTO UNIVERSAL RM-V3 REMOTOS BAHIA Tube. Duration : 1.28 Mins.
REMOTOS BAHIA Absolutamente todo en Controles Remotos para TV - DVD - LCD - Home Theater - Audio Portón & Garage - Alarma - Aire Acondicionado. Igual a su remoto original, no requiere programación! La mejor calidad del mercado, con circuito integrado (no gota). Nueva línea para: LCD - Home Theater - Audio car - Kretz Cenit (para balanza). Portón & Garage: Aviatel - Lavandera - Peccinin - PPA. Y también universales de primera marca! ¡Más de 600 modelos, stock permanente, garantía escrita! Venta - Reparación - Atención al gremio. REMOTOS BAHIA En sus 2 UNICAS direcciones: Belgrano 115 12 de Octubre 549 (y Casanova) Tel.(0291) 451-7939 - Bahía Blanca (8000). Seguinos en Facebook: www.facebook.com/remotosbahia CONTROLES REMOTOS EN BAHIA BLANCA
Runtime error 7 is a coarse error which shows at random times on your Pc. It shows the "Out Of Memory" message - and consequently stops your software / processes from running. The error itself is not undoubtedly caused by a general lack of memory, but a uncomplicated question with one of the Dll files of your ideas - Fm20.dll. This file is used on a estimate of Windows applications to help with a estimate of dissimilar functions on your Pc, but is sometimes used in a continuous "loop", foremost your Pc to become unable to read the file as it loses too much memory.
This error will typically appear in this format:
Runtime Error "7″: Out of Memory
How To Program Rca Universal Remote
In order to fix Runtime Error 7, you need to be able to heal the assorted problems which are causing it to show up. Not many people know this - buy this error is predominantly caused by an issue with the Fm20.dll file on your ideas being unable to run correctly. This causes the assorted applications which need the file to continually loop - using up more & more memory on your system. The steps to decree this error are to first stop the Fm20.dll file from running, and then precise any issues on your software / Windows ideas which may be contributing to the error.
How to Fix Runtime Error 7 - "Out of Memory"
2-DEVICE Universal Remote with Big Buttons Best
Rate This Product :
2-DEVICE Universal Remote with Big Buttons Feature
Looks nearly identical to the RM-V310
Sports the exact same case size and design
Housing is now black
Has an adjacent LED for feedback during programming
2-DEVICE Universal Remote with Big Buttons Overview
Sony Universal Remote Control RMEZ4 Universal Remote Controls
Customer Reviews
*** Product Information and Prices Stored: Mar 14, 2012 00:25:26
The first step is to remove Fm20.dll from your application (if you're a developer) or to stop using the application (if you're a user). This is vitally foremost as it means that if you're seeing to get the most out of your Pc, you need to ensure that all things is working as smoothly as possible. After you've done that, you should then remove the comctl32.ocx file from your Pc, as this may also be causing some problems that could lead to the runtime 7 error. This file is used to control assorted aspects of your software, and is used by many programs on Windows. Unregistering & then replacing the file will refresh it and allow it to run properly again.
You also need to clean out the registry of your Pc. This is a central database which shop vital settings & information for Windows, and is what allows your computer to "remember" a huge estimate of foremost details for your Pc. Although this database is arguably one of the most foremost parts of all Windows systems, it's also causing many problems for your ideas - along with Dll & runtime errors. In order to ensure the registry is 100% operational, you need to be able to use a registry cleaner program to automatically scan through your ideas and fix the assorted errors that are inside.
How to Fix Runtime Error 7 - "Out of Memory"Wavit 3D Media-PC Remote Control - TV demo Video Clips. Duration : 1.18 Mins.
3 of 10: Watching Movies on MCE Demo This is a demo that shows how controlling your Windows Media Center from the couch becomes trivial and enjoyable when you use the Wavit direct-pointing 3D remote. Navigate large amounts of content on your Media Center PC, scan and point-and-click on your EPG (electronic program guide), and change the volume by twisting your wrist like a virtual dial. The WavIt also condenses all the "transport buttons" (FFW, REW, Skip, Stop, Pause, Play, Skip back) into a single button and twist action - simply twist the remote like you would a jog dial! ThinkOptics has just launched this remote control product for the PC. It is a free space direct-pointing device and it will revolutionize the way we watch TV, surf the web, play games, and navigate content from the living room couch. Think of it as the Wii for the PC. It is also a universal learning remote control with a built-in IR blaster so you can control all your old IR devices. Check it out at www.wavit.com
If you want to learn how to put movies on your iPhone, this report will strive to show you how. The Apple iPhone is a overwhelming piece of hardware, following hot on the heels of the phenomenally thriving Apple iPod.
The iPhone has the quality to be a one stop entertainment center, as well as giving you passage to the internet, and of policy a cell phone as well. The quality to play movies on the move will be great for film fans, and save them having to carry a conveyable Dvd player.
How To Program Rca Universal Remote
To be able to watch movies on an iPhone, they will need to transferred from a computer. What you need alongside the computer will depend on where the movie is going to be taken from. If it is a Dvd movie, you will need some software which can read the movie from the disc, and change it to the type of file that the iPhone can handle. This format is called mp4. Downloading from the internet will mean that you will need a decent internet connection, but no conversion software.
How To Put Movies On Your Iphone - The Quick Way
Motorola Digital NEW COMCAST HDTV DVR CABLE REMOTE CONTROL Best
Rate This Product :
Motorola Digital NEW COMCAST HDTV DVR CABLE REMOTE CONTROL Feature
This Remote Control works with major cable provider's digital cable boxes
It works for HDTV On Demand Services
It works with Comcast, Cox, Shaw, Rogers, Media One, Cable Vision, Charters, RCA, Time Warner and Many others.
Motorola Digital NEW COMCAST HDTV DVR CABLE REMOTE CONTROL Overview
This Comcast Digital Cable on Demand DVR remote control operates Comcast digital cable boxes including those with On Demand service. This remote also operates most TV's, DVD's, VCR's, PVR's, DVR's, Audio Receivers, and TV/VCR combos.
Customer Reviews
*** Product Information and Prices Stored: Mar 12, 2012 14:17:58
The first episode in how to put movies on your iPhone is to download some extra software onto your computer that can change the movie into the .mp4 format. This software is very easy to find, but there is a lot of choice. A lot of this software is quite expensive, as much as in some cases, but some of it is cheap, and you can even find free downloads. Some of the expensive programs have a free trial duration should you only have a few movies to convert. Place your Dvd into the computer's drive, and use the software to rip the movie and change it. Use iTunes to copy it to your iPhone.
Once you have copied your Dvd variety to your iPhone, you may want to progress by downloading more movies from the internet. This will work out much economy than buying Dvds in the long run, if you are man who watches a lot of films. It is possible to download films without paying any money, using P2P sites, but this is very risky. These sites are illegal, and if you are caught you could be facing prosecution. There are other dangers, as these files are put up by anyone they can comprise anything. Often, they are just excuses to spread viruses and spyware.
There are legal sites which offer unlimited downloads, but you will have to pay a small upfront fee. This will prove to be a trade as time goes by, and you get ever more for your money.
You now know the basics of how to put movies on your iPhone, so hopefully you have found this report useful. Check out the links below to find the best places to download the movies from.
How To Put Movies On Your Iphone - The Quick WayHow to Program a Universal Remote Control : Types of Universal Remote Controls Tube. Duration : 0.85 Mins.
Learn about the types of universal remote controls with expert tips in this free home electronics tutorial video clip. Expert: Tony Ramirez Bio: Electronics and media guru Tony Ramirez is known among his friends, family, and clients as "Inspector Gadget. Filmmaker: Adolph Ramirez
RCA RCRN06GR 6 Device Universal Remote with Blue Backlit Keypad (Gloss Black) Best
Rate This Product :
RCA RCRN06GR 6 Device Universal Remote with Blue Backlit Keypad (Gloss Black) Feature
Blue backlit keypad with red, blue, yellow and green keys access advanced cable, satellite or Blue-ray functions
Controls TV, SAT/CBL/DTC/DVD/VCR
Ergonomic, thin design
Auto code search
Volume and transport key punch through
RCA RCRN06GR 6 Device Universal Remote with Blue Backlit Keypad (Gloss Black) Overview
RCA 6 Device remote controls are easy to program and easy to use, with a variety of designs and form factors to suit different environments or preferences. These remotes are carefully engineered to put keys where you'd expect, making them a comfortable fit for replacing or consolidating your original remotes. And RCA 6 device remotes are among the first designed specifically for digital and HDTV, offering digital TV converter box codes and support for new features such as HDTV sub channels. RCA 6 device remotes operate TV, satellite, cable or digital TV converter boxes, and DVD or VCR devices, with support for over 325 brands.
Customer Reviews
*** Product Information and Prices Stored: Mar 11, 2012 10:32:10
Your sass for high-speed internet in remote areas is ready cross 48 states in approximately every angle of the contiguous United States. 30 times faster than dial-up for file transfers and downloads at a broadband rate of 1.5 Mbps and uploads at a rate of up to 256 Kbps! For home or office, this two-way wireless principles lets you download music and movies, run your firm efficiently and much more.
No matter what service you select when you want satellite Internet, factory takes just a few hours. All you need is a clear line of sight with the Southern sky and you're ready to go.
How To Program Rca Universal Remote
Don't let your beloved shows pass your by or worry about cable continuing to rising their rates. With free factory and no tool to buy, you'll be ahead of the game from the very start.
Cheap Satellite Television, Hi-Speed Internet Combo
RCA D 770 - universal remote control ( D770 ) Best
Rate This Product :
RCA D 770 - universal remote control ( D770 ) Feature
Compatible with most brands of DBS Systems
Gemstar Guide Plus Gold
Extensive Code Library to operate your brand
RF Capable with extended range
RCA D 770 - universal remote control ( D770 ) Overview
Guaranteed to bring out the channel-surfer in you, this 6 Device RF Capable DirecTV Universal Remote Control from RCA is compatible with most brands of DBS Systems and has an extensive code library to operate your brand. And with the ability to connect up to 6 devices - including DirecTV, a VCR and a DVD player - and Gemstar Guide Plus Gold, this remote is a channel-surfer's paradise. Surf's up, dude!
Customer Reviews
*** Product Information and Prices Stored: Mar 10, 2012 05:42:23
Not only digital Tv but with Hdtv you have the option to "program" your Dvr from everywhere in the world there is an Internet Connection. Also, you can get a free Hd Dvr upgrade. A Dvr, many report, changed their Tv viewing habits forever.
Get the best movies in Hd, including Pay Per View, Hd Net Movies, featuring an extensive film library, as well as Universal Hd with blockbuster films. In addition, you'll get some premium channels in Hd including Hbo Hd and Showtime Hd free when you subscribe to any premium movie box along with the Hd programming package. Added Hd programming includes special events.
Want to stay local? No problem! Satellite Tv also makes Hd local channels (Abc, Cbs, Fox, Nbc, Pbs and Cw) ready in a fast growing number of cities. Furthermore, if you're a sports fan, enjoy Hd sports with our sports subscriptions such as Nfl games in Hd with the Nfl Sunday ticket SuperFan package. You can also see many Regional Sports Network (Rsn) games as well in Hd.
Using the power of satellite Tv, you'll get unmistakably sharp digital channels and Hdtv. If you resolve to bundle a high-speed internet box with satellite Internet, one satellite victualer gives and extra off a month for a full year service.
RCA D 770 - universal remote control ( D770 ) Best
Rate This Product :
RCA D 770 - universal remote control ( D770 ) Feature
Compatible with most brands of DBS Systems
Gemstar Guide Plus Gold
Extensive Code Library to operate your brand
RF Capable with extended range
RCA D 770 - universal remote control ( D770 ) Overview
Guaranteed to bring out the channel-surfer in you, this 6 Device RF Capable DirecTV Universal Remote Control from RCA is compatible with most brands of DBS Systems and has an extensive code library to operate your brand. And with the ability to connect up to 6 devices - including DirecTV, a VCR and a DVD player - and Gemstar Guide Plus Gold, this remote is a channel-surfer's paradise. Surf's up, dude!
Customer Reviews
*** Product Information and Prices Stored: Mar 08, 2012 04:19:41
Change traffic lights with a universal remote! Video Clips. Duration : 1.38 Mins.
With this simple trick using a universal remote, you will never have to wait in traffic again! TWITTER: twitter.com FACEBOOK: facebook.com 2ND CHANNEL: youtube.com STORE: www.gagfilms.com DAILYBOOTH: dailybooth.com SEND ME STUFF! Daneboe 2658 Griffith Park Blvd. #803 Los Angeles, CA 90039
A receiver is that big, heavy thing that you plug your speakers and other components into (like a Dvd player, Tv, Cd player, Xbox, PlayStation, iPod, and etc.). Its the "brain" of the show, really. The idea of connecting all your components to a receiver is the plan of audio/video switching, allowing you to switch to distinct video sources (like Tv, Dvd, camcorder) on your Tv
and thus changing the audio source accordingly - all without touching anyone but the receiver.
How To Program Rca Universal Remote
Of course, the main purpose behind audio/video switching with a receiver is to drive audio to external speakers, like surround sound or stereo speakers.
Hook Up A Receiver For Your Home Theater
RCA 8-DEVICE Navilight Remote Control Best
Rate This Product :
RCA 8-DEVICE Navilight Remote Control Feature
NaviLight remote control illuminates and backlights the words for the mode you are using
Improved button layout and conveniently-sized buttons for easy navigation
Program via direct entry, manual code search and auto-code search
Large code library makes it compatible with todays most popular brands
Advanced sleep timer
RCA 8-DEVICE Navilight Remote Control Overview
NaviLight remote control illuminates and backlights the words for the mode you are usingImproved button layout and conveniently-sized buttons for easy navigationProgram via direct entry manual code search and auto-code search Large code library makes it compatible with today's most popular brandsAdvanced sleep timer
Customer Reviews
*** Product Information and Prices Stored: Mar 03, 2012 07:07:29
Most receivers have a plethora of inputs; up to 8 speakers and a subwoofer (more commonly, 5.1, or five speakers and a subwoofer), several video inputs, and even Hdmi inputs. You could plug your Xbox, Plasma, and Dvd player into the receiver and use one remote to switch between all the distinct video sources (games, Tv, Dvd video) and have your speakers pump out surround-sound. Let's start with inputs and outputs. If you don't understand something, read straight through the whole How-To as most of it will be explained in detail.
Keep in mind that a receiver is the hub of your whole home theatre, so this How-To will of course guide you straight through the basics of connecting your faultless home theater.
So what the heck is all this 'stuff' on the back of your receiver?
I'm going to go over just about anyone that you would find on the back of your receiver. The one I'm basing this guide off of is a Harman Kardon Avr-247 I'm going to start from the top left of the unit and work my way to the right, then I'll start at the left of the next row and so on.
The first three inputs are for antennas. An Fm antenna cable would slide on to the first jack while two speaker wires would plug into the remaining slots for Am. Of course, you don't have to plug your antennas in, but if you'd like Am/Fm reception straight through your speakers, you'll want to go ahead and do that. These are thorough connections, so if you lose one of your antennas, just go buy another for a few bucks.
You've probably heard of composite video. Its a very basic video relationship used by most any component (Tv, Dvd, Vcr especially). Its common and its cheap. As such, its very low quality.
Composite uses an Rca cable for video (yellow) and two more Rca cables for audio (red and white, stereo). The problem is that a composite video cable combines luminance and chrominance in the same cable, reducing the capability of the picture. You lose a lot of sharpness, and the color begins to degrade from the original source. Its useful when you need the extra input or the gadget you're connecting only has composite video. Otherwise, use something else, like component video. Sounds similar; very different.
S-Video is next in line after composite. It uses a distinct type of connector (five pins in a circle) and gives you marginally better video quality. It is also a video-only cable, so you'll need to plug in audio separately. In this case, you'll probably use a pair of red and white Rca cables for your audio inputs.
Next up: a ton of composite audio inputs. These inputs use left channel and right channel Rca cables, typically red and white. They look just like the yellow composite video cable, and you could even use them for video and the yellow for audio, but let's keep the color scheme how it is ;) Composite audio is the bottom-of-the-barrel in audio. Its perfectly fine for most use, but if you're finding for high capability surround sound, you don't want composite. Game systems, like the Wii or Xbox, and very basic Dvd players are a excellent match for composite audio.
The same goes to Vcrs, Cd players, and anyone that only has a composite audio output. Plus, if you don't have surround sound, or your receiver is only two channels (2.1, stereo sound), you won't be able to use anyone but composite audio. Note that there is a composite audio input under each composite video input so that it is easy to match them up. Plug them in the wrong inputs and you won't get sound when you're on that particular video input.
Here we have one of the least-used features of a contemporary receiver: 6 (or 8) channel direct input. This is only used for two purposes: Sacd or Dvd Audio. Sacd is an acronym for Super Audio Cd. It is a ownership audio format developed by Sony for extra Cds that are recorded in 5.1 surround sound. That means you need a Cd or Dvd/Cd player that supports Sacds, a receiver with Sacd hold (as in the picture), and of policy Super Audio Cd's. Dvd Audio is the same idea, distinct brand, distinct media (its a Dvd, not a Cd!).
Dvd Audio discs are extra Dvds that are recorded in 5.1 surround sound and can only be played by devices with hold for them. These Cds go all the way up to 7.1 surround sound, meaning you would need to have two front, two rear, two side speakers and a subwoofer to enjoy full 7.1 surround sound. Most receivers hold up to 7.1 now but you won't find Dvds with that kind of capability for movies. 5.1 surround is still the defacto standard, so don't run out and buy more speakers any time soon.
You could skip this next exiguous item because it is unique to this brand of receiver (Harman Kardon). The Bridge" is a ownership relationship they developed for you to connect
an iPod. You need to buy a separate component that includes a docking center and extra cables to associate the iPod. It fully integrates with the receiver, displaying
menus and songs on the front Lcd screen of the receiver. This allows you to of course pump your tunes straight through your speakers, whether it be stereo sound or full surround sound.
Of course, the music on your iPod is stereo sound, so the best you can get is simulated surround sound or stereo surround; the same music playing in the front two channels
is put straight through the rear and center channels. Some receivers do this more intelligently than others, but more on that later.
Here we have our high-end sound inputs/outputs. Basically the same performance wise, you have fiber optic connections (with the square shape) and digital coaxial (just like an Rca cable).
Both of these are 100% digital, whereas composite is analog. The only way you can get true surround sound from any source is by using one of these connections (or the Sacd/Dvd Audio option)
Almost all Dvd players these days have whether optical or digital coaxial outputs (sometimes, both). Many high definition cable and satellite boxes also come with these
connections so you can enjoy 5.1 surround sound on high definition channels. Choosing between the two, there's of course no distinct in audio quality, so feel free to use
what you'd like (or what you're forced to).
I don't think I need an image for the next plug. Its a pair of power inputs. One is for powering the receiver, the other for anyone you'd like. This way, when you turn
on the receiver, you give power to the other gadget (be it a Dvd player, Cd player, cable box, whatever). I don't necessarily propose this unless it specifically suits
your needs. It is useful if you're running low on outlets, of course.
Something else you'll never use: D-bus Rc-5 input/output. This is used for infrared remote controls to take over your home theater system. Honestly, its not something any of us will ever use. Some of the real high-end junkies might be using something for it, but I've never even come across a gadget that uses this technology. Stick to the remote that came with your unit, or buy a capability universalremote control. There's no need for this option. An alternate use for this may be a bit more common: if your receiver's front panel is blocked (like inside a cabinet), you could get an infrared transmitter to latch on to the front of it. This transmitter would hook up to another gadget somewhere in your room that will accept signals from your remote control. The receiving gadget then transmits the remote's commands to your receiver (via the transmitter you've attached to the front over the regular infrared transmitter).
Pre-outs , settled right under the Remote in/out. Pre-outs are used when you'd like to add an amplifier to your principles to boost the power (and hence volume/audio quality). Average
users will not use this for anyone but the subwoofer preout. You'll want to run a subwoofer cable from your subwoofer to the subwoofer pre-out to provide it with
the right frequencies. This is the proper way to associate your subwoofer to your surround sound system. The other inputs won't be used unless you plan on adding
an amplifier. This is extremely unnecessary for home use. You might add an amp if you're trying to fill a room the size of a small house with enough sound, but you're not, right?
Here we finally get to the meat of the system: the speaker inputs! Harman Kardon receivers use bind posts for connecting speakers, as seen in the picture. They
work by being loosened up as your turn them counter-clockwise, then you sneak the speaker wire in underneath the caps and tighten them back up by turning clockwise. This'll
give your speaker wire a nice tug fit that probably won't loosen up on itself over time. Other brands may use other types of connectors, but bind posts are very common.
You might have been able to tell this is a 7.1 channel receiver because of the speaker inputs.
You've got room for 2 front left and right speakers, 2 rear left and right speakers,
a center channel, and two left and right "surround" channels which are settled somewhere in between your front and rear speakers ("side surround", or 7.1). If you have enough
speakers, you can go ahead and plug in those extra 2 side ones, but they won't play any sound at all on a 5.1 Dvd. You would need a Dvd that supports 7.1
surround sound, and at this time, there just isn't a shop for it. Cds will gladly blast stereo surround straight through all 7 speakers, though, so for some larger rooms, that's an
advantage.
Our final set of connectors for this receiver: component video . The best video you can get next to composite or s-video. You'll notice its a set of three cables (all for video),
usually Red, Green and Blue. Don't think that's what the cable does, though - it separates the video signal by luminance and two separate color channels. In the past, component
did it in fact relate R, G, B (splitting the original colors in transmit and recombining them at the destination device), but that is not used in current component video
connections. Component video can carry high definition signals, all the way up to 1080p, so it is the most cost productive and easily ready high definition input.
Not seen on this receiver are Dvi and Hdmi, the two all-digital video connections.
Hdmi is the newest, fastest, sharpest video and audio relationship ready today. Its the only cable that can carry audio and video in one - not to mention, in high definition.
Hdmi must be supported by the source and the display you're connecting it to to use all of its features. Not all Dvd players, cable boxes, or receivers hold both
audio and video in Hdmi. Its becoming more and more of a thorough now to hold both. The advantage is clear: less cable clutter, higher capability audio and video. You can get up
to 1080p high definition video and 7.1 surround sound straight through an Hdmi cable. Newer cable and satellite boxes, Dvd players, high definition Dvd players, and more high-priced receivers
support the full capability of Hdmi. Its the best you can get as all-digital goes.
The last relationship for this narrative is Dvi. Dvi is also all digital like Hdmi, but it cannot process audio signals. Hdmi may provide a technically excellent image,
but I don't think anyone could tell the difference. Dvi supports high definition video all the way up to 1080p, just like Hdmi. Its being used less frequently now,
but if you've bought a new computer or video card for your Pc recently, it probably has a Dvi (or two) port on it. Most computer monitors use Dvi now and video cards
have followed suit. Hdmi is edging its way into the Pc market, but its dominance is seen in the home theater arena.
Now that you've familiarized yourself with common connections, let's plug it all together.
This part of the receiver How-To is going to guide you straight through hooking a 5.1 surround sound system(5 speakers and a subwoofer) with a high-definition Tv, a high-definition cable or satellite box, a Dvd player, and a 5.1 receiver.
Your Tv & Components
Where you put your Tv is dependent on how large it is, how large your room is, and where you will be sitting. If its 50 inches, don't sit more than 10-15 feet away; but no less, either.
A 60" set is excellent for 12-20 feet. If you have a 32 inch set, try to sit no farther than 8-12 feet away. Your receiver, Dvd player, cable box, and other components should obviously be close together, but don't place them physically on top of each other. They all get hot, especially your receiver. If you have no other choice, slide a thin piece of plywood between the components to help dispense the heat.
Lay Out of Speakers
The first step is to lay out your setup. distinct rooms call for distinct locations for your speakers and subwoofer. If your room is a typical rectangle, go ahead and place your two front left and right speakers somewhere flush with the television on that side of the room. Your left speaker goes toward the left corner, right speaker toward the right corner. Don't bother with speaker wire yet (unless your speakers come with speaker wire attached already; in that case, just let them suspend for now). Note that which speaker is left or right is solely dependent on how you associate them to your receiver. Your speakers aren't of course designated "left" or "right".
Depending on how you acquired your speakers, your front speakers could be larger than your rear speakers. That's how you know they're for the front. Otherwise, all your speakers are the same shape and size, and you can use each for any purpose.
One exception: the center channel. Usually, a center channel is much shorter and wider than your other speakers. It should only be used for the center channel. Sometimes, all 5 of your speakers could be the same, commonly on a very inexpensive setup. You can use any of these speakers for any purpose.
Your center channel should all the time go whether directly on top or under your television set. Any way you have to do this, get it done! It's not called the center channel for nothing, you know. Any movie will pump out roughly 90% of the voices you hear and a majority of the rest of the sounds straight through the center channel. It is a vitally foremost component to your surround sound setup.
Your subwoofer should all the time be on the floor. If it is impossible to place it on the floor, get it as close to the floor as possible. Placing it behind objections or in closets will diminish its effects. In a excellent setup, the subwoofer would be on the floor close to the Tv (perhaps off to the left or right) in your line of sight. Nothing should block the side of the subwoofer that air will come out of (usually covered by a grill protecting the subwoofer speaker itself).
When it comes to finding a good spot for your speakers, you might want to mount them. You can commonly buy compatible speaker mounts online or in stores. You can also
use existing shelving, buy some shelving, or place them on tables or other objects. No matter how you do it, try to keep the speakers as close to ear level as possible. A speaker mounted at the ceiling of your room isn't going to give you the optimal aural experience.
The last thing to keep in mind about layout is speaker wire. You'll probably need at least 100ft of speaker wire, but you'll often find yourself using much more if you
try running wire straight through your ceiling, under carpeting, up straight through the basement, or colse to objects to conceal it. Take measurements and buy at least 10% more wire than
you think you need. You'll probably use it!
Cabling
You need to know the distinct kind of speaker wire ready to you before setting up your home theatre. If you bought an Htib (home theater in a box), it probably came with 100ft of horribly cheap speaker wire. You don't want that! Do yourself a favor: buy some high-quality, 14-gauge speaker wire. anyone higher than 14-gauge is just to thin and will be susceptible to interence, capability loss, and poor capability over longer distances. Fourteen gauge is a good thickness and convenient for most home theatres. Make sure its also not too thick - some speaker wire simply will not fit in to the speaker wire jacks on some receivers.
Some receivers use ownership speaker inputs. Sony is one example. Many Sony receivers have extra connectors for speaker wire and will not accept a thorough speaker wire. You'll need to use whether the Sony-provided speaker wire, take the ends off of Sony speaker wire and put it on your own, or buy some of these extra connectors from Sony directly to place on your speaker wire. My recommendation? Avoid any receivers with non-standard speaker wire posts/jacks/connectors. Look for bind posts or other jacks that allow you to slide in and clamp down on a typical speaker wire.
Once you've got your speaker wire sorted out, you'll have to do some cutting and stripping if you opted to purchase your own. This is way easier than it sounds, so don't worry!
Measure out each length one at a time, cutting the speaker wire with whether of course great scissors or a sharp blade. Now you need to strip the ends of the wire. Use whether a stripping tool or plain old scissors. You can place the scissors on the cable and slowly apply some pressure as you twist the scissors colse to the cable, thought about slicing into the plastic coating. Eventually, it'll get weak enough that you can just slide it off by tugging on it with your fingers. You need at least 1/4" of exposed wire.
Now you can associate your speakers. Note on your speaker wire the disagreement between the two ends. You'll need to use one as your inescapable and one as your negative. Sometimes the coating is a distinct color between the two or there is text on one and not on the other. Keep track of this - whichever side you use for inescapable on your speaker, use it for inescapable on your receiver. Crossing the two can cause damage, whether immediately or sometime in the future. It might work this way but you don't want it to!
Connecting the speakers is easy enough. Front left to front left on your receiver, center speaker to center on your receiver, etc... Your rear speakers may be referred to as "Surround" or "Rear Surround" instead of just "Rear", but keep in mind, if you have a 7.1 or 8.1 channel receiver, "Surround" may indicate side surround speakers, not rear speakers.
Subwoofers
Your subwoofer is going to be a exiguous more complicated. There are a few distinct ways to do it and many variations of inputs/ouputs on the back side of subwoofers. I'm going to go with the most thorough and productive recipe first.
You will need a subwoofer cable for connecting your sub. If you don't have one or don't want to buy one, you can substitute it for a thorough red or white Rca cable (or a pair, since they are commonly connected; just let the other cable dangle). It will work, but its of course not the best way to do it. You'll also need whats called a Y adapter. On the back of your sub, there should be a left/right input (red and white). You plug the Y adapter in to these connections and then your subwoofer cable (or Rca cable) in the other end of the Y (note: if you don't have a Y adapter, just choose the left or right input to plug into).
Now, take the other end of your cable and plug it into your receiver's
subwoofer preout. Hopefully you have a powered sub, meaning it gets plugged into an Ac power outlet. All you need to do now is plug that in and your subwoofer is good to.
If you don't have Rca jacks on your subwoofer, or it only has speaker wire jacks (and its most likely not powered), you'll need to associate it the old fashioned way. Your front left and right speakers will plug into your subwoofer's ouput jacks instead of your receiver. You'll then run speaker wire from the left and right inputs on the subwoofer to your left and right speaker outputs on your receiver. This way, the subwoofer is powered by the receiver and will not work as well as a powered sub. You also take some power away from your front speakers with this method. A good idea is to buy a new, powered subwoofer with line in Rca jacks.
Connecting the Dots
You've got the hard stuff out of the way. Now close it up by connecting your Tv, Dvd, and cable/satellite box. all the time try using the best options first. If your Dvd
has Hdmi and so does your receiver, use it. If your Dvd only has composite, s-video, and component, use component video cable. When it comes to audio, you of course need
to use digital coaxial (jacks are commonly orange) or fiber optic (usually the jack is recessed into the unit and has a door on it; when the door is open, a red light is visible). If you do not use whether of these two, you won't get true surround sound! When all else fails, resort to composite (red and white) audio connectors.
Note: Look closely at the connections on your receiver. all is labeled, like the first set of red, green, and blue component video inputs might be labeled "Comp 1". If you're using composite audio cablesfor your sound, you'll need to plug them into the jacks that coordinate with "Comp 1". This might not be clear by finding at the receiver, so refer to your receiver's hand-operated to form out which video inputs use which audio inputs. Most often, you'll be able to configure them from the receiver's internal menu using the remote control.
On some receivers, all the component video inputs, for example, are associated to a particular composite audio input (usually "Dvd"), so if you associate more than one of the component inputs, you will be contentious for sound when more than one gadget is active. This is why you'd want to configure the component inputs to use distinct audio inputs.
Your hand-operated is the only way to form out how to go about it. Composite video will commonly match up to composite audio inputs with naming conventions like Video 1 -> Video 1, Video 2 -> Video 2, etc., but cables like component and Dvi may not. You should also configure digital audio inputs to match up with the video inputs you're planning on using. For example, if you're using a digital coaxial input (possibly "Digital 1"), and you use component video, you'll want to match "Digital 1" with "Comp 1". Again, refer to your users hand-operated for how to do this.
Hook Up A Receiver For Your Home TheaterProgram DirecTV remote with Xbox 360 Tube. Duration : 5.03 Mins.
Step by step instructions on how to find and activate programming codes for your xbox 360 using your DirecTv remote control. Hopefully, this video will help you save . God bless and enjoy.
Do you want to uninstall Java from your computer but you genuinely have no clue how to do this? If so, then you've come to the right place because I will help you to genuinely take off Java from your computer. So, are you ready to finally uninstall and take off Java from your computer. If so, then read the following steps carefully.
How To Uninstall Java
How To Program Rca Universal Remote
In order to fully take off and uninstall Java from your computer, you can do 2 things.
Uninstall Java - How to wholly take off & Uninstall Java
RCA 8-DEVICE Navilight Remote Control Best
Rate This Product :
RCA 8-DEVICE Navilight Remote Control Feature
NaviLight remote control illuminates and backlights the words for the mode you are using
Improved button layout and conveniently-sized buttons for easy navigation
Program via direct entry, manual code search and auto-code search
Large code library makes it compatible with todays most popular brands
Advanced sleep timer
RCA 8-DEVICE Navilight Remote Control Overview
NaviLight remote control illuminates and backlights the words for the mode you are usingImproved button layout and conveniently-sized buttons for easy navigationProgram via direct entry manual code search and auto-code search Large code library makes it compatible with today's most popular brandsAdvanced sleep timer
Customer Reviews
*** Product Information and Prices Stored: Mar 02, 2012 03:29:22
1 - You do it manually and by yourself.
2 - You use a Java Uninstaller to do it automatically.
I highly suggest you that if you are seeing for a java removal plan, that you use selection 2. You see, when you are going to do it all by yourself and manually, you'll have a merge of huge downsides. When you do it yourself, it will cost you lots of time to perform. Also, you'll not only have to take off java from your drivers, but you've also got to go inside your registry to take off any left over files.
And when you are doing this, it's high likely that you delete a wrong file. And when this happens, it's high likely that your computer gets messed up. This costs you even more time and probably some money too. Therefore it's highly recommended that if you want to genuinely uninstall Java, that you use a java uninstaller. But, what uninstaller should you use and how will it take off java from your computer?
What Java Uninstaller To Use When You Want To Uninstall Java
These days there are thousands of uninstaller software programs but 99% plainly fails to work. Therefore it's highly recommended to get an uninstaller that has a good reputation. A great Java uninstaller is called the perfect Uninstaller. The perfect Uninstaller will help you to fully take off Java by doing 3 things.
1 - Firstly, the perfect Uninstaller will uninstall Java.
2 - Once finished, it will start scanning both your registry, and your drivers to find out if there are any let over files.
3 - Once the scan has been completed, the uninstaller will start deleting the files that have been found.
This is how easy the perfect Uninstaller works, and how it removes any program that you want.
Uninstall Java - How to wholly take off & Uninstall JavaHow to Use a Universal Remote Control : Programming Power on Universal Remote Control Tube. Duration : 1.03 Mins.
Learn how to program the power function on a universal remote control with expert tips in this free home electronics tutorial video clip. Expert: Rick Kennedy Bio: Rick has 15 yrs of computer & internet training & experience and is also a web designer. He has owned a cell phone & beeper shop for 5 years & worked with all types of phones as a service technician. Filmmaker: Richard Kennedy